May 2020 archive

Gear review: Boss RC-3 Loop station

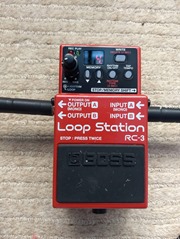
boss-loop-station-rc3In a change from usual service I am reviewing some guitar related gear: a Boss RC-3 Loop Station. Review is probably not the right word, this is the only guitar pedal of this type I’ve used so really this is more about describing what it does, which would be useful for other novices, capturing some of the instructions in a more readable form and sharing some resources.

A loop pedal is a device which records sound – pedals are devices designed to be activated with a foot. The intention of a loop pedal is to capture short sequences of sound which you then play over as they repeat in the background, so that one musician can make the sound of many. Ed Sheeran and KT Tunstall are particularly well-known users of the loop pedal, needless to say that despite owning one I sound no where near as good!

It’s worth noting that although this is advertised as a guitar pedal it will record any sound fed into the input side, I’ve used it with my electric drum kit, it will work with the keyboards we have and if I had a microphone I could sing into it (but nobody wants that).

There are plenty of loop pedals around, following a series of price points / sizes.The cheapest one in the Boss range is the RC-1 for something like £80, I paid £125 for the RC-3 which is one step up from the most basic models. Above the RC-3 in the Boss range are the RC-30 for £171 which has two large size foot switches and the RC-300 for £440 which is much larger and has footswitches for each of three tracks.

The RC-3 has 99 slots to record loops to, and will provide a rhythm track as well in one of 9 styles. There is a USB port which presents the pedal as a file directory, this allows you to backup your loops and save WAV files from elsewhere to it. I picked the Boss because I have a couple of other Boss devices (my amplifier and expression pedal) and I like the brand.

The device itself is nice and chunky, made out of metal. I think I prefer the big rubberised pedal style to the round metal push buttons found on other loop pedals. I found the other controls a bit small and fiddly, I’m not as young as I used to be – bending down and looking at small things are hard! Fundamentally this is a “small format device” problem which isn’t limited to the Boss pedal, space is limited to control the functionality provided so you get a two character display and five push buttons.

The buttons select the memory slot to be used (or cycle through options), select the rhythm functionality, write a loop to a memory slot and allow you to set the tempo of the rhythm track.

A couple of handy hints I picked up from this video by Reidy’s – a fine Lancashire company: firstly the default mode is that pedal presses take you from record to overdub to playback modes, you can change this to record to playback to overdub by holding down the tempo button whilst switching the device on. As a beginner this feels more natural. Secondly, you can clear, undo and redo the current loop by long presses on the pedal – so you can muck around recording and deleting little phrases with just the foot control. These features are both explained in the paper manual which comes with the device.

You can also change the record mode from the default, of starting recording as soon as the pedal is pressed, to auto recording which starts when you start playing and count-in which sounds the rhythm for a measure before recording starts.

The built-in rhythms are as follows:

  1. Hi-hat
  2. Kick & Hi-hat
  3. Rock 1
  4. Rock 2
  5. Pop
  6. Funk
  7. Shuffle
  8. R&B
  9. Latin
  10. Percussion

The tempo is set by tapping the tempo button, you can’t fix it to a specific value using the up and down buttons – most likely because the display can only handle a two digit tempo – and that’s a bit small.

One thing worth noting is if you have a Boss Katana 50 and an expression pedal you will not hear the effect of the expression pedal on the loop pedal recording. This is because the loop pedal is not seeing the expression pedal in its input. You can sort of capture it by putting the loop pedal on the output side of the Katana and plugging headphones, or another amplifier, into the loop pedal but it is not an ideal solution. Higher specification Boss Katana have an external effects loop which is where you would put the loop pedal. More generally the effects you hear on playback are the ones set on the amplifier at playback time, not those being used at record time.

Applications

I’ve already used the Boss for the following:

  • Fiddling about with amplifier tone – record a loop then adjust amplifier settings as it plays back – you don’t have to wrangle your guitar and amplifier at the same time and can hear immediately the effect of your knob twiddling;
  • Record your practicing – I use Yousician which has a lot of exercises – chords changes, fingerpicking, scales and the like. The loop pedal is an easy way to do a quick recording to hear where you are going wrong;
  • Simple rhythm track – it has a bunch of rhythm styles whose tempo you can adjust;
  • Backing chords to play over – I need to practice doing this;
  • Backing sounds from elsewhere

Summary

I am pleased with my purchase! I think it will take me quite a while to get to grips with recording a backing loop – I’ve been watching the Justin Guitar videos below to help me with this.

Resources

Home improvements: Conservatory edition

In a break from my usual service I thought I’d write about some DIY I have been doing during the covid-19 movement restrictions which have meant we have been confined to the home for a large part of the time. The idea of this blog post is to remind me what I have done, and perhaps provide a guide to others.

The Problem

Our house has a small conservatory at the back which opens into the dining room and looks out onto the back garden which is rather pleasant. It contains a large collection of toys, mainly Lego which lives on and in  Ikea Trofast storage units around the perimeter. There is a bespoke storage unit which holds more toys, including mounts for my son’s substantial collection of nerf guns. More recently it has gained an electric drum kit, and my guitar amplifier. It is where I practice playing, slightly detached from the rest of the family but vaguely audible and visible. It is also the cat’s dining room.

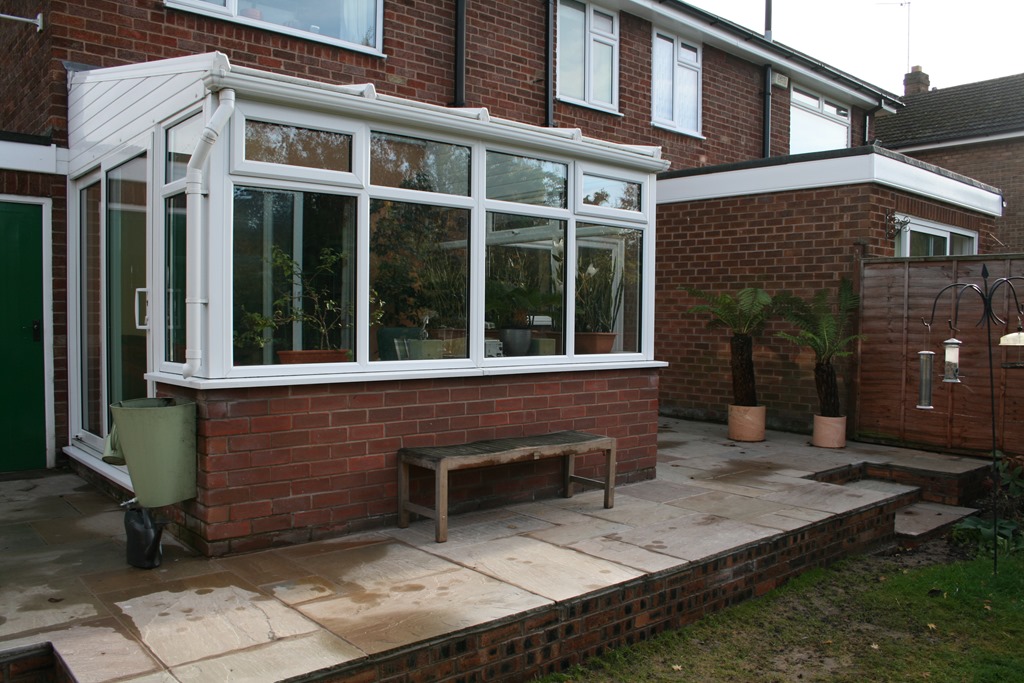
Below is a "before" picture, taken nearly 10 years ago to illustrate our new patio. It serves to shows the context of the conservatory rather than illustrate the problems:

IMG_1115

The Problem is that the conservatory faces west and this means for a substantial part of the year it gets unbearably hot in the afternoon, and very bright. Before the movement restrictions there were no blinds or window covers of any sort. Along with the issues of heat, it is also a little unattractive to look into and the view to one side looks into an odd space outside our kitchen door, facing onto our neighbour’s kitchen extension. So some decorative interest would not go amiss.

I have a vague plan to replace the conservatory with an extension running across the back of the house, so I don’t want to spend a huge amount of money for something that will be torn down in a few years time.

Some solutions

The deluxe solution to this problem is to get in someone like Hilary’s blinds who do a bespoke installation. It’s not quite clear what the price would be but it looks like well over £1000 possibly approaching £2000. Also they cover off the blinds side of the problem well but not any sort of decorative elements and the flexibility around what to do with the roof is limited.

I also looked at these clip fit blinds (and here), they are made to measure and have a spring fitting that sticks under the double glazing seal to hold them in place. They would be rather cheaper than the Hilary’s blinds option – probably a couple of hundred pounds for the four windows I’d like to install them on – the big ones looking down the garden. I looked at a few options like this but held off since I wasn’t confident of delivery under the circumstances. I also wasn’t too sure about whether the anchoring mechanism would work on my windows and under the current circumstances sorting out issues would be a pain.

As it turns out there is a very cheap blinds solution: Stick-on paper blinds! You can get a pack of six here on Amazon for less than £25. I liked this option because it was really cheap and, following a comment on the Q&A on Amazon I thought I could use the paper blinds as a try out for style and if I liked them go for some of the clip fit ones.

For the roof I felt there should be some sort of billowy sail like drapings which I thought would be rather good but I couldn’t find just I what I was looking for – again there seemed to be bespoke options but the route to DIY installation was not so clear. There are "conservatory sails" but these are sails which you use as a sun shade rather than install in a conservatory. I worried about fixings for such things too – I would need to screw mountings into the UPVC frame of the conservatory which didn’t seem ideal. In the end I went with this high reflective film for the roof, I think it had come up as I searched for blinds and the like. It cuts out about 90% of the light which is fine for a sunny spot. I spent about £140 on the reflective film.

Finally the decorative part to go on the windows looking towards the back door. It took me a while to hit the right such term for this, I ended up with this "privacy film" with a bird pattern – I spent about £40 on this.

Installation

I installed in three stages. The patterned film was a couple of evenings after dinner. The paper blinds similarly a couple of short evenings. The reflective film was an evening, and three weekend mornings – a rather bigger job. I wish I’d installed the paper blinds last because they didn’t like having water dripped on them and installing the films required quite a lot of water

The paper blinds are the simplest to install – you cut them to width with a pair of scissors and then stick them to the window at the top with a sticky strip. I found cutting them neatly tricky because they are pleated, and sufficiently thick that you can only cut them a couple of folds at a time. They come supplied with some little alcohol wipes so you can make sure the window you stick to is really clean. Each blind comes with a couple of plastic clips which you can use to hold the folds of the blind up. The inadequacies of my cutting and installation are not too obvious, these blinds work quite well. I found it necessary to cut them to length in order that the clips were able to old the folded part. They could do with a stiffening rod along the bottom edge.

The decorative film was relatively easy to install, you cut to size then peel off a backing film, wet the window thoroughly then squeegee them into place to remove the bubbles. My Stanley knife blade was feeling its age so I ended up scoring the film with the blade then cutting it with the scissors which occasionally left untidy edges. If I did this again I’d use more water on the window – a lesson I learnt from the final piece to be installed.

I left installing the reflective film for last since it involved working overhead and looked the most difficult. The length of the roof panes in the conservatory is nearly 3 metres, I decided wrangling that length of wet, sticky, thin film above my head was a step too far. So after a bit of experimentation I went for installing 150 centimetre strips, this worked pretty well. Installation was similar to the decorative film, except the instructions suggested spraying the window with water spraying the film with water and then spraying the exposed surface of the film with water once it was in place. This was a lot of water, most of which dribbled down my arms as I squeeged the film into place but it actually worked really well. Initially the film has lots of bubbles under it but one pass of the squeegee sorts most of that out. You need to clean the windows properly before putting the film on since any dirt leaves pimples in the film. I never quite cracked cutting the film to exactly the right size, if you cut slightly to big then I found it impossible to cut neatly down to size once in place (perhaps a sharper Stanley knife would have helped), so I ended up undersizing slightly – this isn’t too noticeable though. Similarly butting the edges of the film together was a bit tricky but mistakes here only show if you stand staring at the roof. Finding a corner to peel off the backing takes a knack, I found the best way was to pare away a corner.

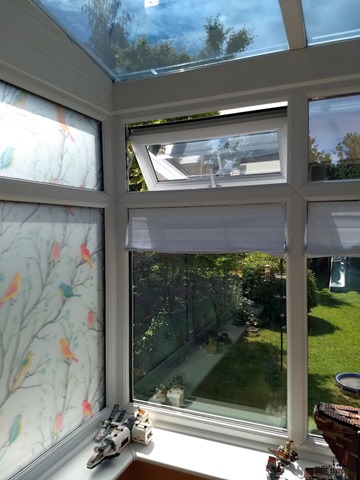
The picture below captures the decorative film, the blinds and the reflective film once installed. The narrow windows at the top also have the reflective film on them.

finished

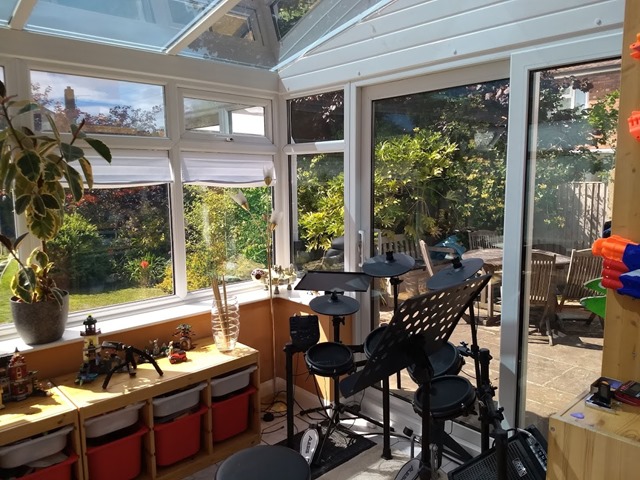
Close inspection shows the installation is not perfect but imperfections are only really noticeable to me when I go looking for them. This second picture shows a bit more context, it is full sun outside and the conservatory is not overheating!

finished2

I wondered about putting some modesty panel style film on the lower half of the patio doors.

Conclusions and further work

I am quite pleased with the results, the conservatory no longer gets unbearable hot in the sun. The reflective film is perhaps a little too reflective in the morning making the dining room a little dim. I’m not sure what the solution is here, the conservatory is quite small and I worry more substantial blinds, and their control mechanisms would be too bulky. You can get electrically switchable window/films but they cost about £40 for an A4 sized panel. The blinds look like pleated paper which is exactly what they are – I will replace them with proper fitted ones in due course.

Book review: The Pope of Physics by Gino Segrè and Bettina Hoerlin

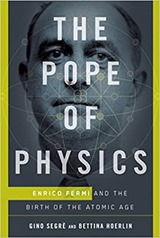
fermiThe Pope of Physics by Gino Segrè and Bettina Hoerlin is the biography of Enrico Fermi. I haven’t read any scientific biography for a while and this book on Enrico Fermi was on my list. He is perhaps best known for leading the team that constructed the first artificial nuclear reactor as part of the Manhattan Project. As a lapsed chemical physicist I also know him for Fermi surfaces, Fermi-Dirac statistics, and the Fermi method. Looking on Wikipedia there is a whole page of physics related items named for him.

Fermi was born at the beginning of the 20th century, his parents were born before Italy was unified in 1870 when illiteracy was not uncommon and people typically stayed close to home since travel quickly involved crossing borders.

Fermi was identified as something of a prodigy whom a friend of his father, Adolfo Amidei, took under his wing and smoothed his path to Pisa Scuola Normale Superior. As I sit here in in a mild lockdown I was bemused to note that the entrance exams Fermi took were delayed by the 1918 Spanish Flu pandemic. At Pisa Fermi learned largely under his own steam, at the time physics was not an important subject – the Pisa Scuola had five professors in physics and only one in physics. Fermi graduated at the top of his class.

After Pisa Fermi fell into the path of Orso Mario Corbino, a physicist, politician and talented organiser who set about helping Fermi to build a career in physics. At the time a new quantum physics was growing, led primarily by young men such as Pauli, Dirac, Heisenberg and Schrödinger who was a little older. Fermi met them on a scholarship to Göttingen in Germany. He later went to Leiden on a scholarship where he met Ehrenfest, and Einstein who was very taken with him. This was preparation for building a new physics capability in Italy.

The fruits of this preparation were a period in the mid-1930s which saw Fermi and his research group at Rome University invent a theory of nuclear decay which revealed the weak nuclear force and postulated the existence of the neutrino (this theoretical work was Fermi’s alone). The wider research group studied the transmutation of elements by slow neutron bombardment. This work was to win Fermi the 1938 Nobel Prize for Physics.

This research led on directly to the discovery of nuclear fission and the chain reaction which became highly relevant as Fermi fled Italy to the US with his wife on the eve of the Second World War. Many of Fermi’s friends, including his wife Laura, were Jewish. Fermi steered clear of politics to a large degree, he benefitted from the patronage of Mussolini but was no fascist enthusiast. The Italian uses of chemical weapons in Ethopia and, ultimately, the racial laws of the late 1930s which expelled Jews from their positions drove him from the country. He had visited the US a number of times in the early 1930s and had little trouble finding a position at Columbia University.

The route to the atomic bomb was not quick and smooth in the early years of the war, a number of physicists had noted the possibility of the fission bomb and attempted to warn politicians of its potential. This all changed when the Americans joined the war, following the Japanese attack on Pearl Harbour.

Building an atomic bomb presented a number of scientific challenges which Fermi was well-placed to address, primary amongst these was building “Critical Pile 1” the first system to undergo a self-sustaining nuclear chain reaction. It was constructed, slightly surreptitiously, in a squash court at Chicago University. It was built there as a result of a dispute with the contractor who was due to build it a little outside Chicago, at Argonne.

The “critical pile” demonstrated two things: firstly that chain reactions existed, and secondly it provided a route to producing the nuclear isotopes required to produce a bomb. It still left the question of how to purify the isotopes, and the question of how to produce a critical mass fast enough to cause a worthwhile explosion.

Fermi would go on to help in the Manhattan Project at Hanford and then Los Alamos where he held a position combining both universal scientific consultancy and administration, or at least organisation.

It is difficult to talk about Fermi’s strengths as a physicist – he had so many – he is almost unique in being both a top flight experimentalist, and theoretician. This is the great divide in physics, and people who are talented in both fields are rare. He was also clearly an excellent teacher, as well as undergraduate teaching and writing a high school physics book he supervised 7 students who would go on to earn Nobel Prizes in physics. Alongside this he was clearly personable.

Fermi died in November 1954 a little after his 53rd birthday, leaving in his wake a large number of prizes, buildings and discoveries as a memorial.

I found The Pope of Physics highly readable, the chapters are quite short but focused.