Tag: astronomy

By Jupiter!

MVI_1270-001

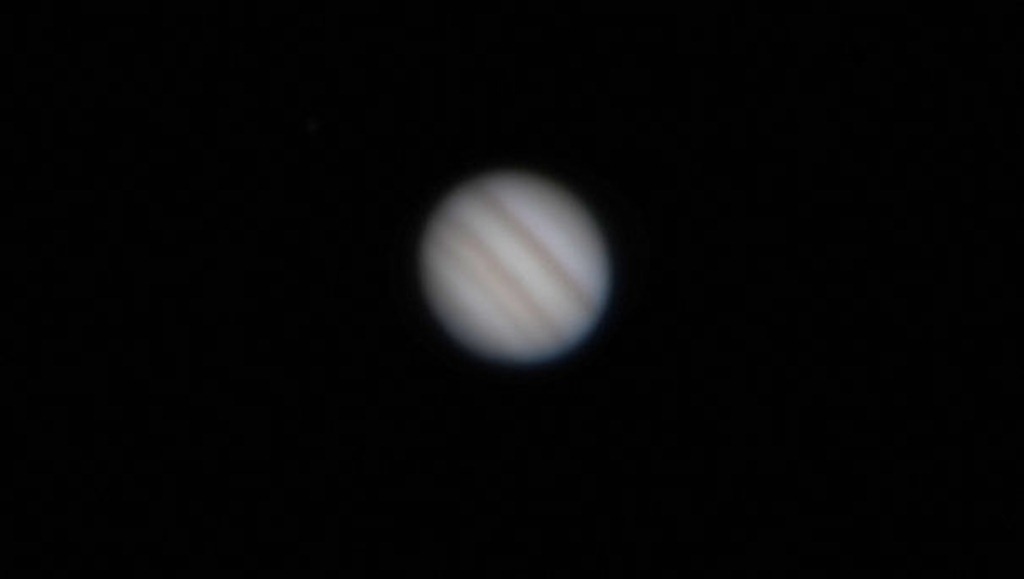
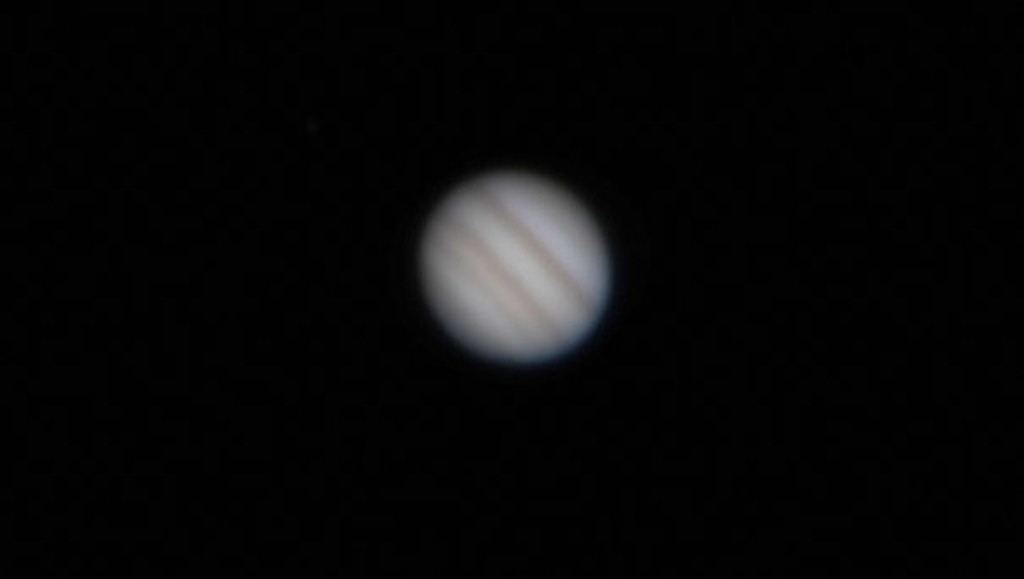
Jupiter (From video acquired on Celestron NexStar 5SE, Baader Hyperion zoom eyepiece at 8mm,Canon 600D, 1/30s at ISO800 stacked in Registax6)

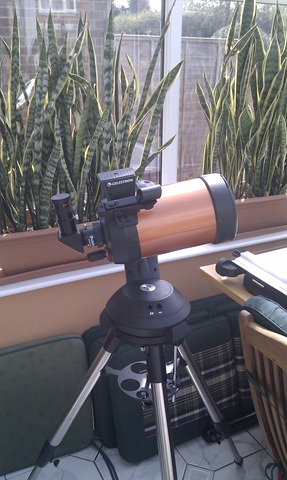
This morning I managed some photos of Jupiter through the telescope, a Celestron NexStar 5SE.

This was helped with my latest purchase: a Baader Hyperion 8mm-24mm zoom eyepiece – this gives me more magnification and allows me to attach to my Canon 600D camera via a couple of mounting rings (here and here). Previously I could only get low magnification on my camera, or high magnification via a 3x Barlow lens.

The Baader-Hyperion is a nice bit of kit, instructions are minimal though so working out how to attach the camera was a case of twisting various bits of the eyepiece to find out what unscrewed – I did this in the light a couple of days ago. The only small problem is that once the camera is attached to the eyepiece it rotates when the zoom level is changed.

I left out the Star Diagonal for these images, this is Celestron’s right angle bending device which gives better naked eye viewing because you can look through the eyepiece from the standing position rather than crawling around on the floor. However, it does seem to introduce some chromatic aberration. The Canon 600D has a rotatable LCD which gives a reasonable viewing position even without the Star Diagonal.

I had a rather disappointing try at Jupiter a few days ago, disappointing because the night started clear but had clouded over almost completely by the time I got my telescope out; then the neighbours started letting off fireworks; then I couldn’t remember how to work my camera in the dark and then it started raining! On top of all that my Baader Hyperion eyepiece hadn’t turned up.

The useful thing I got out of the evening was a fair idea of appropriate ISO number and exposure times to use – Jupiter is surprisingly bright and needs something like ISO800 at 1/50s on my ‘scope, even at high magnification.
IMG_1269

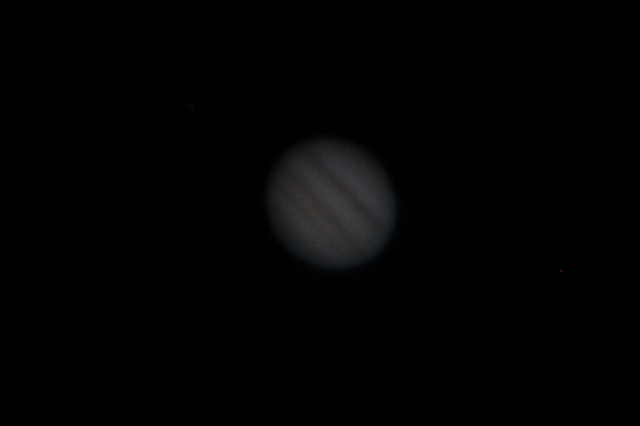
Jupiter, single image Celestron NexStar 5SE, Baader Hyperion zoom eyepiece at 8mm, Canon 600D, 1/50s at ISO800

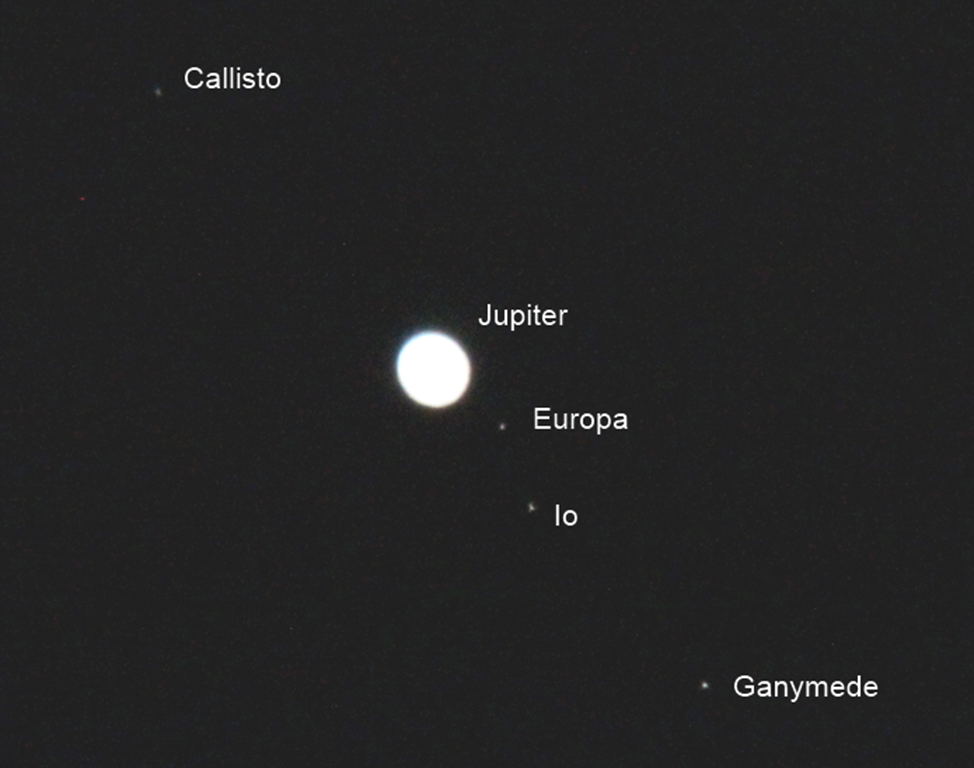
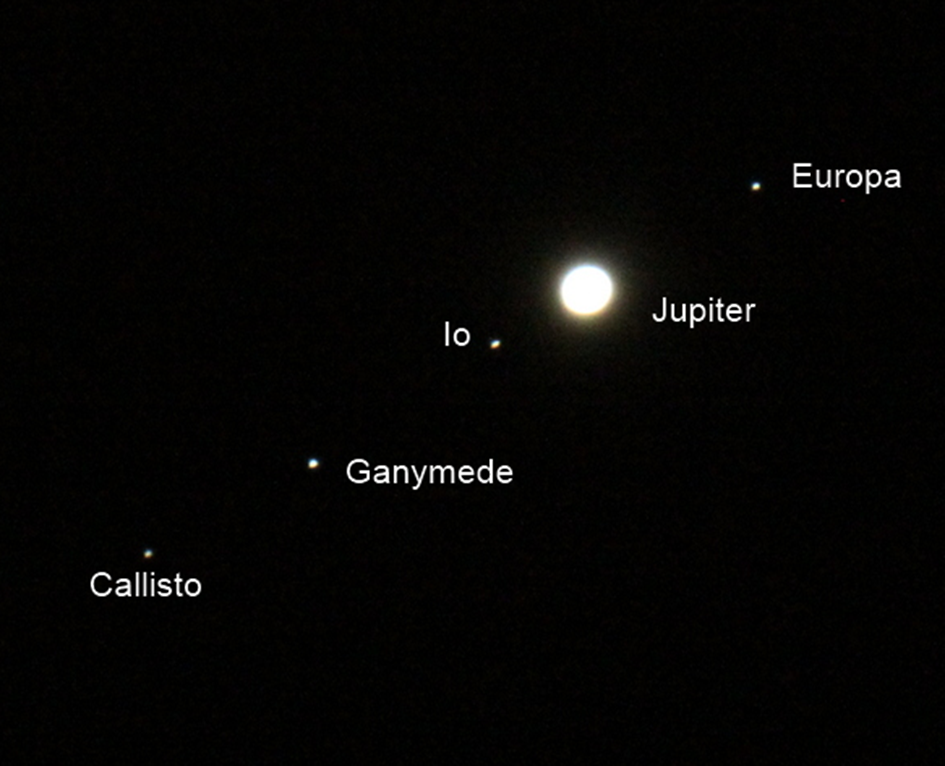
Jupiter was one of Galileo’s first targets for his telescope in the early 17th century, importantly he observed the four brightest Jovian moons (Callisto, Io, Europe and Ganymede). Significant because they orbited Jupiter, not the sun or the earth and they changed from night to night – at the time the stars were supposed to be immutable and rotate around the earth, or at least the Sun.

You can see these in two photos I took, on 5th and 10th November – the moons have moved quite obviously.
Jupiter_5thNov

Jupiter and moons on 5th November at 8pm (Celestron NexStar 5SE, 1/4s at ISO6400)

Jupiter_10thNov

Jupiter and moons on 10th November at 5am (Celestron NexStar 5SE, Baader Hyperion zoom eyepiece at 16mm?, 1/50s at ISO6400)

Actually, it’s not quite that simple: the photo from the 5th was taken in the early evening with Jupiter in the east whilst that on the 10th was taken in the early morning with Jupiter in the west. Jupiter appears to move between these two locations because of the earth’s rotation and this also means the orientation changes. Not only this, my telescope was configured differently on the two occasions: the Star Diagonal + camera combo flips the image vertically whilst the direct eyepiece view flips both horizontally and vertically. I’ve rectified the images appropriately, and labelled them following Stellarium.

I also took some video on the 600D. You can see it here, the juddering at the beginning and end is the result of me poking buttons on the camera. The rippling of the image is the “seeing”, it’s caused by the atmosphere. The point of taking video is that it can be used to mitigate the effect “seeing” by averaging frames, I did this using Registax 6 but first I had to convert the video from Quicktime to avi format using ffmpeg:

ffmpeg –i filename.mov –sameq filename.avi

ffmpeg can do anything with video, if you give it the right incantation, in this case it recognises that I want to convert an input video from mov (Quicktime) format to avi format, the –sameq flag tells it not to drop the quality of the video as it does so.

I have to admit to not really knowing how to use Registax, I simply let it do its default thing and the result looked okay:
MVI_1270-001

Jupiter (From video acquired on Celestron NexStar 5SE, Baader Hyperion zoom eyepiece at 8mm,Canon 600D, 1/30s at ISO800 stacked in Registax6)

A fun half hour of imaging, I’d have moved on to another target if I’d planned ahead. The earlier, unsuccessful imaging session was helpful in getting me close to the right camera settings and spurring me to learn how to learn how to use the camera in the dark. The Baader Hyperion eyepiece is rather nice!

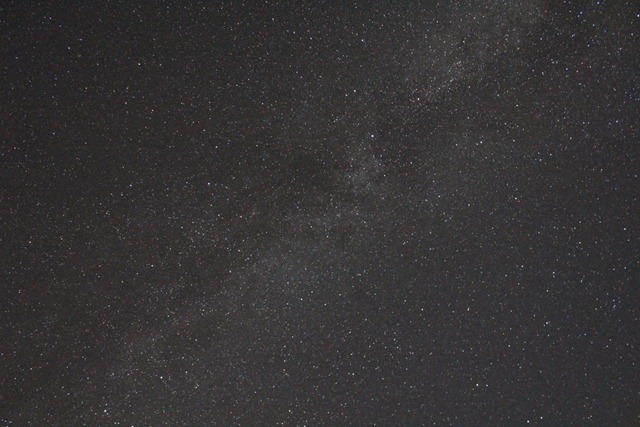
The Milky Way

Milky Way

The Milky Way (Canon 600D, 18mm, ISO6400, 30s, f/4.5)

Regular readers will know I recently bought myself a telescope, a Celestron 5SE Schmidt-Cassegrain reflector but this post covers some astrophotography conducted without the aid of a telescope almost the opposite in fact. I’ve been on holiday recently to somewhere with pretty good dark skies, unfortunately I did not have my telescope with me but I did have a tripod, a Canon 600D SLR and a collection of lenses although in this instance I just used the 18-55mm kit lens at the wide end (18mm). I also had my planisphere and a copy of the free planetarium software, Stellarium.

I’ve used my camera with a standard lens to take photos of the night sky before: to make star trails, so far my experiments in this area have been a bit disappointing. The aim with star trail photographs is to have nice bright trails showing the apparent motion of stars around the pole as the earth rotates, against a dark background. In my experiments I used 30s exposures at f/4, ISO200 on a 10mm lens which I then combined using a simple application called StarTrails.

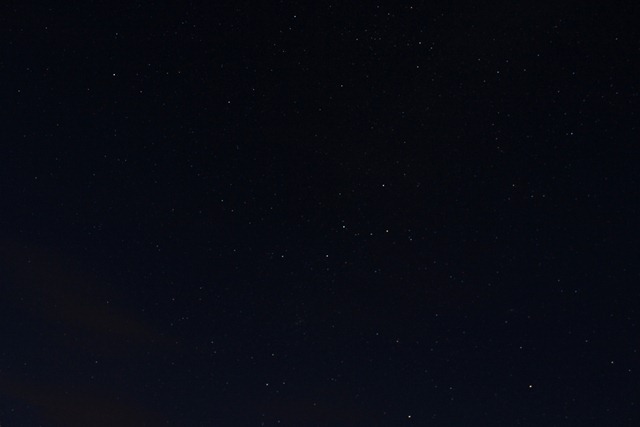
Back to my holiday snaps – I started my evening taking photos as I had done for my star trails, I have to say this was all a bit disappointing – individual photos do show the stars in the sky and with some effort one can trace out the patterns of the constellations – you might just be able to spot Cassiopeia in the image below.

Towards Cassepoia

Cassiopeia (Canon 600D, 18mm, ISO200, 30s, f/4.5)

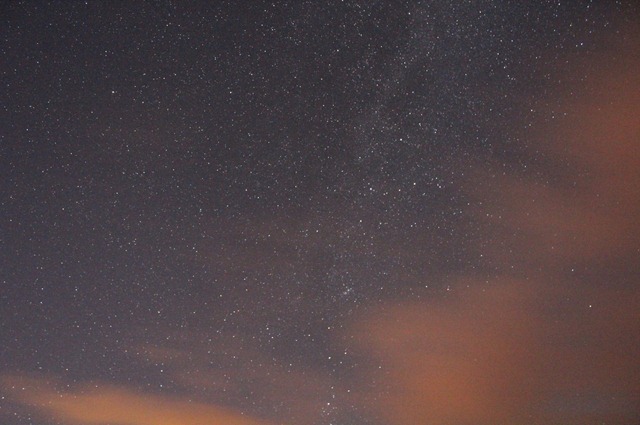
Getting a bit bored with this, I turned the sensitivity right up so I was imaging at f/4.5 ISO6400 with 30s exposures and suddenly this popped out:

Towards Casseopia

The Milky Way towards Cassiopeia (Canon 600D, 18mm, ISO6400, 30s, f/4.5)

Cassiopeia is in there somewhere but there are just so many more stars (and a few clouds). This opened the flood gates and I indiscriminately fired off shots along the line of the Milky Way, just visible in the image above. At this time of year, in the early evening in the UK the Milky Way goes from horizon to horizon passing almost directly overhead starting a little East of North and finishing a little West of South.

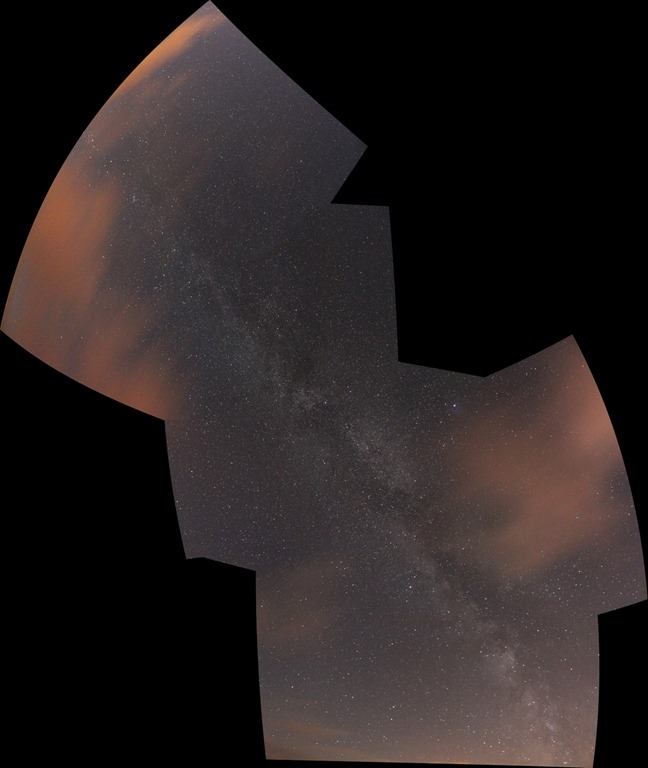
Now this is fun but now I have a bunch of images of parts of the Milky Way. Can I stick them together? It turns out I can, I used Microsoft ICE on the images I had acquired and got this mosaic:

Milk Way Composite

The Milky Way, 5 image mosaic prepared in Microsoft ICE (Canon 600D, 18mm, ISO6400, 30s, f/4.5)

This spans almost horizon to horizon. I was rather pleased with this, however I struggled to work out where I was in the sky, picking out constellations from the huge mess of stars is very tricky. It turns out help is at hand in the form of astrometry.net, this is an online service which takes an image of the night sky and works out which bit of the sky it shows and labels it all nicely. It can’t handle the mosaic image shown above, but can handle the individual images – you can see my images here. One of the formats in which data is provided is Google Earth’s KMZ format, so you can see the images projected onto the celestial sphere in Google Earth – my combined KMZ file is here, it’s 12MB.

There are improvements to be made in the process:

  • if I’d had it with me my 10-22mm lens would have been nice – it would give me more sky in one shot;
  • better familiarity with my planisphere would mean less indiscriminate firing off of shots;
  • ideally I’d have gone for a cloudless night;
  • there’s a bit of optimisation on the exposure settings, ISO6400 is at the limit of my camera and if you zoom right in there is some evidence of colour noise, also towards the zenith the stars are motion smeared – as in star trail pictures so shorter exposures would be nice;
  • compositionally it would be good to include some of the earthly scenery;
  • working out how to turn off the security lights of the holiday cottage we were staying in would have been good.

All in all a rather fun evening!

The sky at night!

And so after 10 days, I finally had a chance to play with my new telescope on Friday night! Optical astronomy requires at least a few gaps in the clouds but last night at 8pm it was completely clear – I was hopping up and down like an overactive child waiting for the sun to go down (scheduled for about 8:40pm) and simultaneously cursing the slightest wisp of cloud. It should be clear that I’m a bit new to this, so what I write shouldn’t be seen as in the slightest bit authorative.

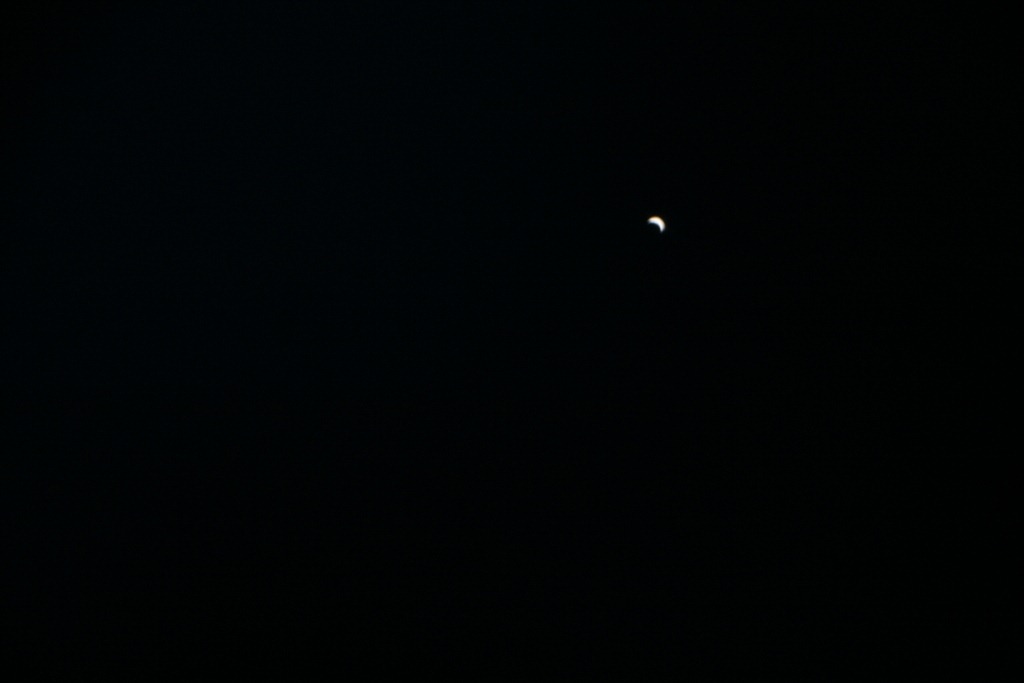
Kindly folk at @newburyastro had suggested Venus and Saturn as targets for my first adventure into the night. Useful advice because, as a relative beginner I had little idea what I was going to see, or in fact when I was going to see it. Venus become visible at about 9:20pm towards the now-set sun, it turns out that pointing the ‘scope with the finderscope is much easier than the rather more hazardous enterprise of finding the sun without (something I describe here). In the eyepiece Venus appears as a small, bright crescent.

It was a breezy evening which meant that my view jiggled about a bit, it also jiggled about a bit whenever I touched the telescope. However I did manage a picture of Venus taken on my Canon 400D at prime focus. This is an uncropped view, and it’s upside down.

IMG_1887-001

Venus (1/50 second, ISO200)


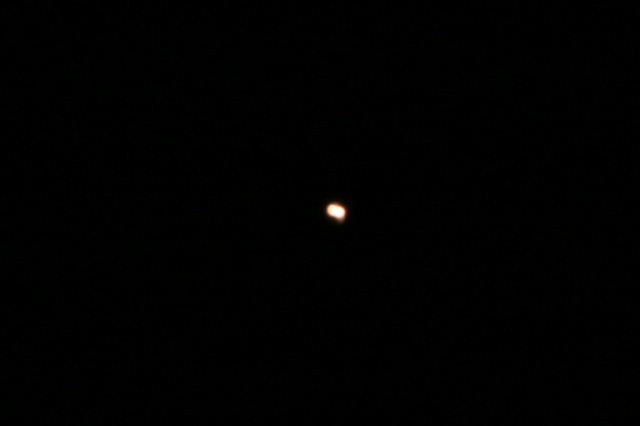
Mars made an appearance a little later at about 9:35pm along with a bright star which I believe is Regulus. This enabled me to get my telescope to work out how it was orientated meaning it could track to objects on demand and also tell me what I was looking at (very handy for a novice). My picture of Mars is a little uninspiring, I’ve zoomed in here as far as possible, in Mars’ favour it does look red and it isn’t a simple point.

IMG_1893-001

Mars (cropped, 1/3 second, ISO200)


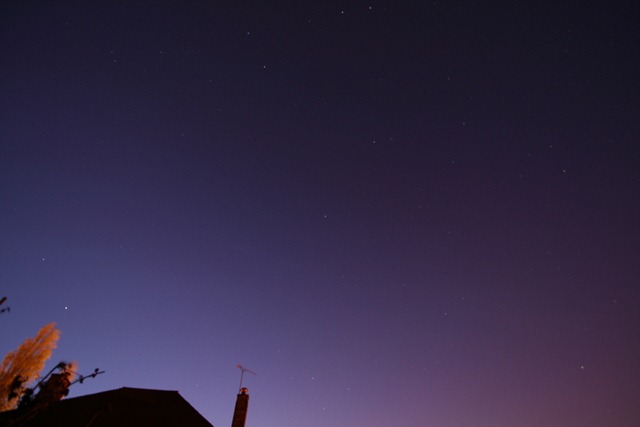
By now more and more stars were coming out, so I thought I’d try out my piggyback mount. This image is taken with a 10mm lens (i.e. really wide angle) with the telescope simply used as a camera mount pointed at Polaris, it’s a 30s exposure.

IMG_1896

The Northern circumpolar region (Canon 400D, 10mm, 30s ISO200, f/4)


It took a while to get this because I had auto-focus on and the camera couldn’t find anything to focus on so wouldn’t fire – switching off auto-focus and focusing to infinity manually resolved this. It was at this point I wished I could remember how to switch the display on the back of my camera off because it was really bright, and remember which button was which without being able to see it. The thing that surprised me about this is that there are rather more stars than I could see with my naked eye and some of them are quite strongly coloured. I feel I should go about identifying the stars in my picture.

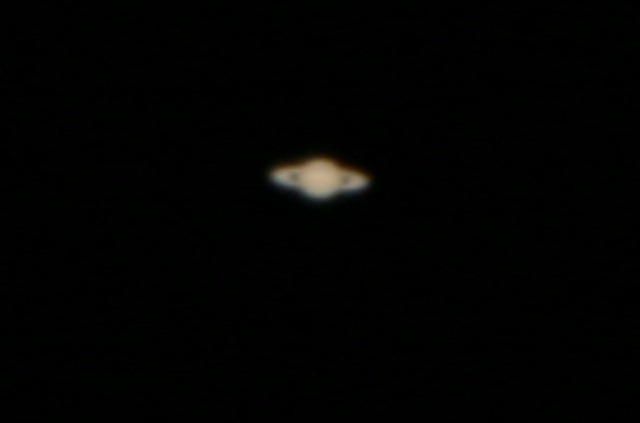
At this point I thought I’d give Saturn a go, I must admit I thought it was hidden behind buildings and trees from my position in the back garden but I punched it into the telescope handset and it pointed me into the side of the conservatory, so I picked up the telescope and moved it one metre to the right, peered through the finderscope and tweaked my direction a bit and… the planet with ears popped into view!! This was really exciting! I only have one eyepiece for my telescope and it’s quite low magnification but through the eyepiece I could see my target was not a point, and it was not round – it was shaped like a flying saucer and there were slight gaps either side of the central body. Having marvelled at this for a bit I thought I’d try for another photograph:

IMG_1910

Saturn (cropped, 1/4s, ISO200)


It’s not the best picture of Saturn taken last night but it is my picture!

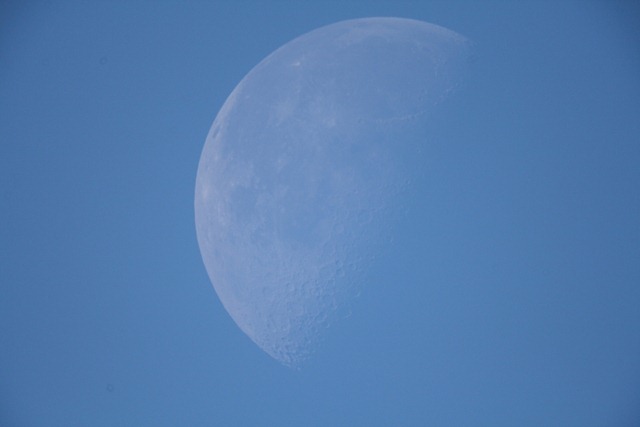
The moon hadn’t risen before I went to bed, so when I spotted this morning I rushed out for a photo.

IMG_1918

The Moon 9(1/500s, ISO400)


I’ve not done any astrophotography before these (apart from my shots of the sun, and a couple of shots at the moon through a conventional lens). I guess the thing I carried over from that was that the moon is a rock in full sun, so you need to set your exposure times accordingly, the same is true for Mars and Venus so I suspect I should be using shorter exposure times for them to which will also reduce any motion blur.

My first night of viewing has highlighted a need to have a better grip of how to work your camera, plan what you want to look at in advance and, as with an SLR camera, a telescope is simply a gateway drug for further accessory purchase.

First light–images of the sun

I’ve had my new telescope (a Celestron NexStar 5SE) nearly a week now and so far I have images of miscellaneous chimney pots, arials, pigeons, and… the sun. Only the last of these can be considered fair astronomical game, I’ve had two goes at it so far. I tending to the view that my telescope blog posts shall be like a lab book of what I have done rather than a guide to others, except to perhaps highlight those things that are obvious to experienced astronomers but not to the novice.

The first rule about looking at the sun through a telescope is:

Do it carefully with the appropriate solar filter in place

Seriously, be really careful pointing telescopes at the sun – mine is a small one and it concentrates light by a factor of 300, looking near the sun with the naked eye is bad – imagine x300 more light!

I bought a sheet of Baader AstroSolar solar filter film at the same time as I got my telescope, this comes in the form of a thin A4 sheet of material that looks like foil. It has an optical density of 5, meaning it lets 0.001% of the incident light through. There are detailed instructions supplied with the AstroSolar film for constructing your own mount for the material, or you could go and buy a proper mounted filter (here).

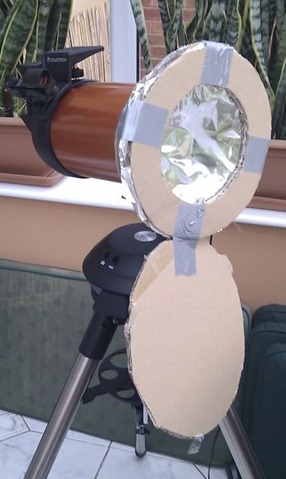
The aim of the filter mount is to hold the filter film without stressing it and in a manner convenient to attach it to the front of your telescope. I should, perhaps, have used the “thick card” that the instructions recommended rather than the corrugated cardboard from the box the telescope came in, and it turns out double-sided carpet tape is really exceedingly sticky. However, the result shown in the image below is functional and I have included a built-in “filter shield” of my own invention for storage. Behind the two cardboard rings sandwiching the filter is a cardboard tube which fits neatly over the optical tube.

SolarFilter

Celestron NexStar 5SE with homemade solar filter from Baader AstroSolar

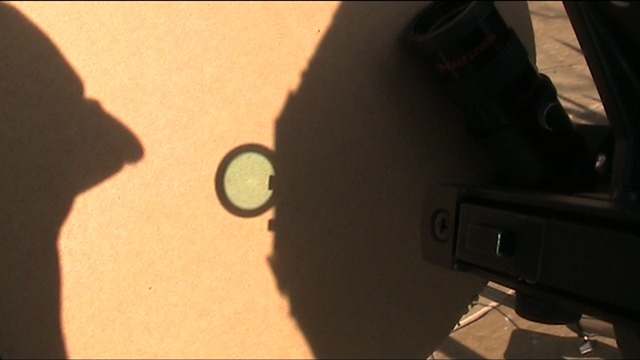
The next challenge is pointing the telescope at the sun, this turns out to be pretty tricky because with a solar filter in place the only thing in the sky that you can see is the sun, the field of view on my telescope is approximately the size of the moon, you can’t navigate by distinctive clouds and you can’t look through your finderscope unless it is also solar filtered. I’d read that you should move the telescope until the shadow of its tube is a circle – I tried doing this on the ground (minimising the area rather than trying to get a circle). At one point I thought I’d found the sun but from later observations I suspect I was staring at an internal reflection. But easier, since my telescope has a non-magnifying StarPointer finderscope I cast the shadow of that onto a piece of card until it looked round (see image below). The second time I tried this, I got a “hole-in-one” – the sun in my field of view at the first attempt! I could improve this by slotting a disk with a small hole in the middle into the finderscope and aligning until a bright spot appeared in the middle.

StarPointer_solarfinding

Shadow of the Celestron Star Pointer, used to align the telescope to the sun

 I have to say that seeing the sun through my telescope for the first time was as exciting as digging up potatoes, that’s to say really exciting!

I then moved to trying to photograph my target, I did this using a Canon 400D SLR. The camera is attached by a T-mount to the back of the telescope, in place of the eyepiece. This means that the telescope is replacing the camera lens,s known as “prime focus photography”. Two configurations are possible: with and without the “Star Diagonal” in place. The field of view through the Star Diagonal is smaller, and dimmer than the direct connection however the viewing position is more comfortable and there is less risk of the camera falling off! The direct connection gives a correctly oriented view through the camera, whilst the Star Diagonal gives an upside-down view. The focus position for the eyepiece and the two different camera configurations are all different. The camera is triggered using a remote release cable.

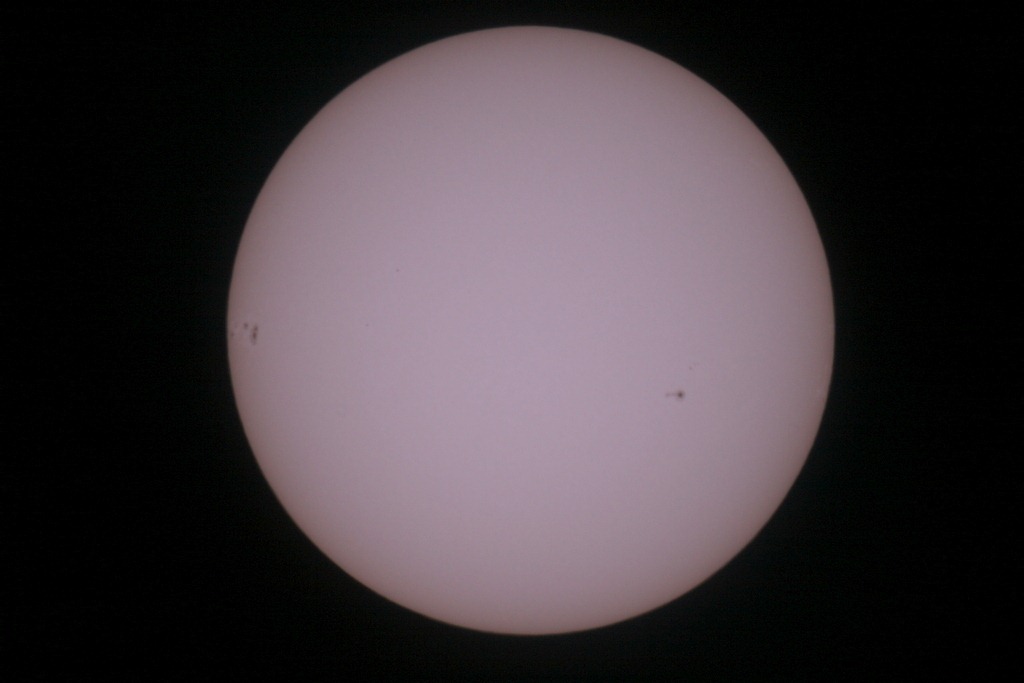
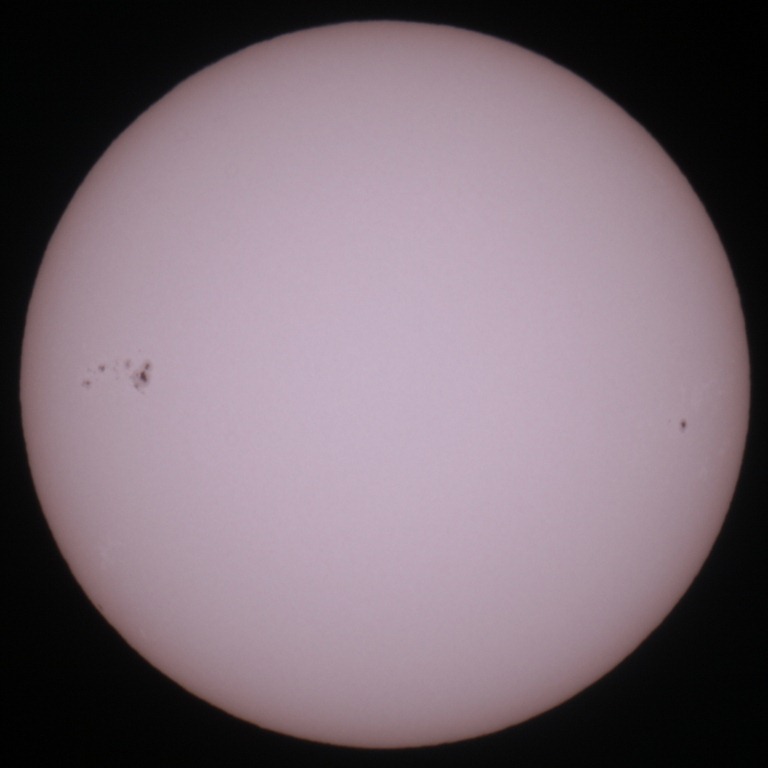
My first attempt is shown below, this is a 1/640s at ISO200 taken without the StarDiagonal:

IMG_1790

Image of the sun, Canon 400D ISO200, 1/640s exposure

Below are crops to the two visible clusters of sunspots:

IMG_1790-002

Sunspot detail

IMG_1790-001

Sunspot detail

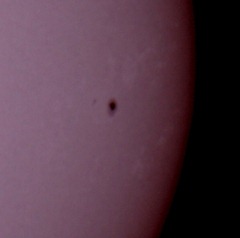
These look a little less distinct than they did through the eyepiece which may have been because I forgot to enable “mirror lockup”. The second time around I did a bit better, this is taken at ISO100 with a 1/125s exposure again without the StarDiagonal:

IMG_1837-002

Image of the sun, Canon 400D ISO100, 1/125s exposure

With a detail of the sunspots:

IMG_1837-001

Sunspot detail

I have a nice set of solar features, sunspots with dark umbra and a paler penumbra, limb darkening (the sun appears less bright towards its edges) and plages (related to faculae) which are bright spots, these are pretty difficult to see. The image below is a crop of the sunspot area to the right hand side of the image above with some contrast enhancement (I boosted the shadows using Picasa) which just about shows the plages:

IMG_1837-003

Solar photo showing plages

Next time I should probably set the white balance to something other than “auto”, and experiment a bit with exposure times to see if I can get the plages showing up a little better. A Barlow lens would give me some magnification of the sunspots… and so the spending on accessories begins!

Celestron NexStar 5Se – a 125mm reflecting telescope

CelestronNexStar5SEThis is a brief overview of my shiny new purchase: a Celestron NexStar 5SE telescope. As an experiment I have also embedded a video review (here), I should also point out that so far cloud cover has meant the only celestial object I have observed is the sun (using the appropriate safety measures).

I bought my ‘scope from Sherwood’s, who I am happy to recommend for their good prices, and quick and efficient service. My purchase list was as follows:

  • Celestron NexStar 5SE (with mains adaptor)
  • SLA AstroPower station 12v 7Ah battery pack
  • Piggyback mount for my Canon 400D SLR
  • Universal camera adaptor and T-mount for similar
  • Moon filter
  • Baader solar filter film

The mount is powered, the add-on battery pack seemed like the best option for providing that power conveniently. I have a Canon 400D SLR camera which I wanted to use with the telescope, the piggyback mount lets me put the camera on top of the optical tube and simply use it to point the camera at the sky. The T-mount assembly allows me to use the telescope as a camera lens, albeit without auto-focus and aperture.

The solar filter is essential if you want to look at the sun, and I got the impression a moon filter was useful for dimming the brightness of the moon, photographers will know that when photographing the moon the exposure time is as if for a rock sitting in full sun, which is exactly what it is!

The 5SE is a Schmidt-Cassegrain telescope with a 125mm (5 inch) primary mirror, a focal length of 1250mm and an overall F/ratio of 10. “Schmidt-Cassegrain” means that the open end of the tube has a corrector plate (Schmidt’s contribution) and light is focussed by a large concave primary mirror and a smaller convex secondary mirror in the centre of the corrector plate. The image is viewed through an eyepiece in the back of the optical tube, behind the primary mirror. In practical terms it also means the telescope has a very short tube length making it more portable than similarly specified telescopes. The whole assembly is easy to pick up and carry in its deployed state, and the optical tube in particular was well-packed on delivery forming the basis of a useful carrycase.

The telescope is supplied with a 25mm focal length eyepiece which gives a magnification of x50, the maximum useful magnification of the telescope should be x300 with appropriate eyepiece. Focus is achieved by turning a knob on the back plane of the telescope tube, which moves the primary mirror. The eyepiece is attached to a periscope (Star Diagonal in Celestron’s parlance) to give a more comfortable viewing position. The finderscope is a Celestron Star Pointer, which is a non-magnifying window with an LED spot projected to the middle for guiding, it took me a little while to get the hang of this but I can see the benefit of a low magnification finderscope.

The telescope is on a computerized alt-azimuth mount which also includes an equatorial wedge (like the equatorial platform), meaning that the rotational motion of the mount can be made co-axial with that of the earth – allowing un-rotated tracking of objects through the sky for astrophotographic purposes. The controller is a handset device on a cord, in night time operation the telescope can be aligned to the night sky by pointing it to three different stars, after which it will goto any one of a huge catalogue of celestial objects selected using the handset.

The optical tube feels nice and chunky, although the finderscope is a bit plasticky. The piggyback mount attaches using the same mounting holes as the finderscope, the finderscope then bolts back on top, I did a bit of tweaky of the screws along with adjustments on the finderscope to get it aligned. I have achieved fine views of my neighbours chimney pot!

There is a battery compartment in the mount which takes 8xAA batteries, reading on the internet I understand the lifetime for this set is about 30 minutes in operation, which is why I got both a mains adaptor and a 3rd party battery pack. I suspect I’ll mainly use the add-on battery pack for the convenience of fewer trailing leads. The mount doesn’t operate without power, which is a bit of a drawback, the telescope can be tilted but not rotated. The mount sits on top of a nice chunky tripod, to which it is attached by three screws, so in principle you could make yourself a “manualised” version by sitting the scope on a turntable. I have the slightly spurious desire to see a graduated scale on the mount movements. I’m used to using research grade optical equipment and whilst the optics have that feel about them the mount, although functional, does not.

The telescope comes with TheSkyX (First Light edition) planetarium software, and also an application called “NexRemote” which seems to allow you to control the telescope using a virtual version of the handset on screen – this seems a bit pointless to me! Other telescope control software is available, and it appears there is an interface standard. The programmer in me is hankering to write my own controller software!

Overall I’m pleased with my new purchase but desperate for a slightly less cloudy night to try it out properly – no doubt more blog posts to follow once I’ve done this! Even at £650 for the telescope it is cheaper than many lenses for my Canon SLR, although it is a little chastening that John Hadley’s 1721 reflecting telescope had a larger primary mirror.

Update:

After a few weeks of twilight use I thought it might be useful to add a couple of further comments which don’t really make a full new blog post:

1. You can get and set the telescope azimuth and altitude directly using the appropriate entries in the Utilities menu, without alignment these values are based on an assumed initial position of 0,0. During the hours of daylight, when only a very limited number of celestial bodies may be visible, you can carry out a “single body” alignment using the “Solar System Align” option in Alignment. This allows you to enable tracking, and to Goto specified absolute coordinates – useful if you want to survey heights of neighbouring obstructions.

2. The 5SE does not support autoguiding whilst the 6SE and 8SE do. The NexStar range does seem a bit confusing in terms of the facilities available across the range, the 5SE for another example is the only one to have a built-in equatorial wedge.

Here is a video tour, which covers much of what I’ve written above but includes the sound of me tripping over the cat’s water bowl: